HOW TO:
ALIGN BIKE GEARS
There’s nothing worse than fighting against the gears while riding your bike. With this guide, you’ll learn how to adjust and index your gears perfectly.
Tools required:
- Torque wrench (essential)
- 4mm & 5mm Allen key bits
- Number 2 Philips (+) screwdriver
- Bike stand (optional)
Working order
- Rear derailleur limit screws
- Rear derailleur tension & indexing
- Front derailleur height & angle
- Front derailleur limit screws
- Front derailleur tension & indexing
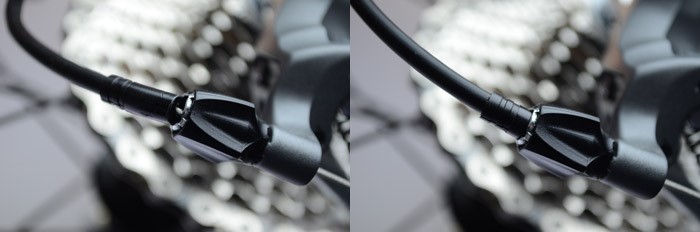
Before starting, make sure all cable barrel adjusters are fully wound in. These can be found on the rear derailleur, gear shifters, and (on some bikes) inline on the cables.
Rear derailleur limit screws
The limit screws on a derailleur prevent it from moving too far in either direction, making sure that your chain doesn’t jump off the end of the cassette or chainring.
If this happens, the chain can become wedged between the cassette and the wheel or frame and can potentially cause severe damage.
Each derailleur has a High and a Low limit screw. These limit the derailleur at each end of the cassette, in the high gear (small sprocket) and low gear (large sprocket).
Setting the HIGH limit
- Change gear into the smallest ring on the cassette (highest gear)
- Undo the cable retaining bolt using a 4/5mm Allen key (some older, cheaper models may use a small hex nut)
- While turning the cranks by hand, slowly slacken the high (H) screw on the derailleur by turning anti-clockwise until you start hearing the chain making a skipping noise
- Tighten the H screw up until the noise stops, followed by another ¼ turn. If the noise starts again, turn it anticlockwise until it stops
Setting the LOWlimit
- With the cable retaining bolt still slack, turn the cranks by hand and push the derailleur into the 2nd largest ring on the cassette
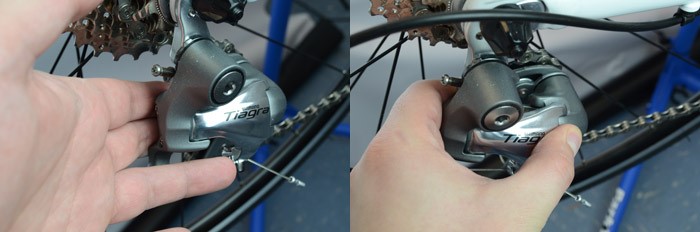
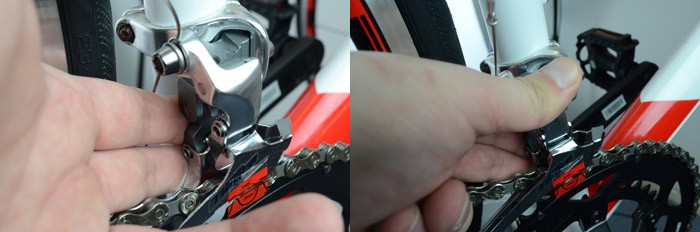
Note: Grip the derailleur with your hand (pictured below). DO NOT push the derailleur by the jockey wheels - Stop turning the cranks and stop the wheel from spinning
- Without turning the cranks, push the derailleur towards the largest cassette ring until it stops
- While holding the derailleur, carefully turn the wheel by hand
- Does the derailleur catch the spoke? If so, turn the low (L) limit screw clockwise until there is 2-3mm clearance
- Once the derailleur is clear of the spokes, keep pushing it towards the largest cassette ring while turning the cranks
- If the chain doesn’t go into the largest cassette ring but the derailleur is still close to the spokes, the derailleur or mech hanger are likely bent out of shape and require replacement or professional realignment
- If the chain goes into the largest ring and makes a noise while turning the cranks, tighten/slacken the L screw until the noise disappears
Rear derailleur tension & indexing
With the upper and lower limits now set, you can clamp the cable back in place and adjust the tension, so that the gears are indexed correctly.
- With the cable clamping bolt slack, use one hand to put some tension on the cable and change the rear shifter into the highest gear, so that the cable pulls through fully
- Check that any cable outer ferrules (pictured below) are secured into the frame/shifter
- Feed the cable into the clamp on the derailleur, ensuring the cable rests in the groove of the clamping plate

- Pull the cable through tightly with one hand, while using the torque wrench & 4/5mm Allen bit to tighten the clamping bolt
- Turn the cranks and shift up & down through the gears
- Wind the barrel adjuster on the derailleur out (anti-clockwise) until the gears change evenly
- If the shift lever gets tight and doesn’t change into first gear easily, slacken the L limiter screw off ¼ turn until it does.
- If you can’t get enough tension in the cable using the derailleur barrel adjuster alone, wind the barrel all the way back in, slacken the cable retaining bolt and pull it through more tightly before clamping it again. Then repeat steps 1 to 6
Front derailleur height & angle
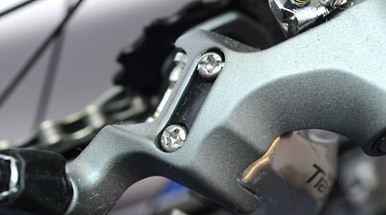
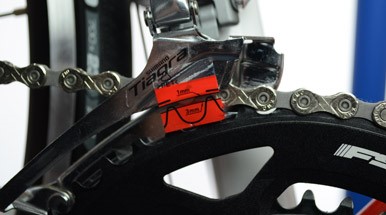
When setting up your front derailleur, the height of the outer side of the chain cage needs to be between 1-3mm above the outer chainring (pictured). If you’re fitting a new derailleur, it will typically come with a stick-on guide to help you set this height correctly.
When setting the angle of the derailleur, the outer side of the chain cage needs to be parallel with the chainrings. A common error is to set the chain cage so that it is parallel with the chain. However, the angle of the chain will change depending on the gear you are in.
Warning: Make sure you tighten the derailleur mounting bolts and/or clamp using a torque wrench. Overtightening these bolts can damage your frame. This is especially important with carbon fibre bike frames.
Front derailleur limit screws
Just like the rear derailleur, the front has a pair of limit screws for High and Low gears.
The L screw sets the stop for the smallest chainring, and the H screw sets the stop at the larger chainring.
If your derailleur doesn’t have identifying marks showing which screw is the L and which is the H, try turning each of them one at a time, without moving it by hand and without the cable installed. The screw which causes the derailleur to move is the L screw.

Setting the LOW limit
- Change the front and rear shifters into the lowest gear and rotate the cranks until the chain moves onto the inner chainring
Note: If the chain won’t move onto the inner ring, wind the L screw anticlockwise until it does - Undo the cable retailing bolt on the derailleur
- Adjust the L screw until the chain sits in the middle between the chain cage side plates
Setting the HIGH limit
- Change gear into the smallest ring on the cassette (highest gear)
- Undo the cable retaining bolt
- While turning the cranks by hand, hold the derailleur all the way out towards the large chainring by hand (pictured below)
- Slacken the high (H) screw on the derailleur by turning anti-clockwise until you hear the chain rubbing against the outer plate of the chain cage
- Tighten the H screw up until the noise stops, followed by another ¼ turn
- If the chain rubs against the inner plate of the chain cage, ensure the outer plate of the cage is parallel with with the large chainring, then set the low & high limit screws again
Front derailleur tension & indexing
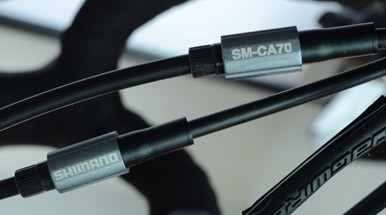
Unlike the rear, a front derailleur will typically lack a barrel adjuster on the derailleur itself, which means you might only have the adjuster on the shifter to work with.
Many road bikes come with inline barrel adjusters already fitted; these can be bought and retrofitted to virtually any bike with cable-operated mechanical gearing.
To set the cable tension on the front derailleur:
- A) Wind the barrel adjuster on the shifter (and inline if present) all the way in
- Pull the cable through the derailleur tight and clamp it down using the torque wrench
- Wind the inline barrel adjuster (or shifter adjuster if none are present) outwards just until the point where the derailleur begins to move off the low limiter
- Turn the cranks by hand and check that the gears change up and down smoothly, testing different combinations of front & rear gear selections
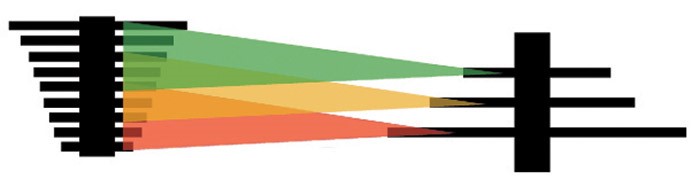
When changing gears on the front derailleur, it’s important to remember to change gears at the rear of the bike at the same time. Never cross the chain from the largest ring at the front to the largest ring at the rear, likewise never cross from the smallest ring at the front to the smallest ring at the rear. The image below shows the safe gear combinations on a typical 27 speed drivetrain.